Picture 1 of 7


Picture 1 of 7


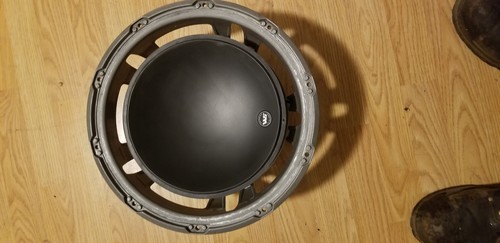
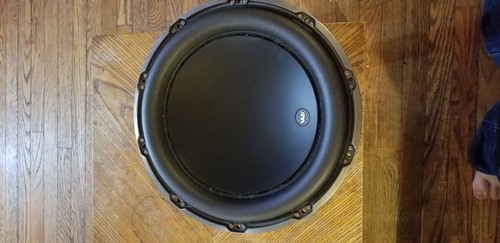
3 JL Audio 12" 12w6v2 Speaker Foam Surround Repair Kit - 12w6 V2

www.SimplySpeakers.com (59797)
99.8% positive feedback
Price:
US $32.00
ApproximatelyC $44.01
+ $15.38 shipping
Returns:
30 days return. Buyer pays for return shipping. If you use an eBay shipping label, it will be deducted from your refund amount. Policy depends on shipping service.
Condition:
- Buy It NowJL Audio 12W6v2 12" Subwoofer Refoam Repair Kit 1 Foam - FREE SHIPPING! (SINGLE)
Oops! Looks like we're having trouble connecting to our server.
Refresh your browser window to try again.
About this product
Product Identifiers
BrandSS Audio
MPNFSK12JLV2
eBay Product ID (ePID)1344513275
Product Key Features
Size12 in
Compatible Model12W6v2-D4
All listings for this product


Ratings and Reviews
Most relevant reviews
- Oct 03, 2019
Jl w6v2 foam kit
I was real skeptical about doing this myself because I have never done a speaker re-foan before, but after a lot of time and effort and sore hands of removing all the glue residue and getting it prepared for the new glue everything lined up great with the W6sv2s the foam is designed so tight that there is no need for trying to re-center the voice coil because it’s so tight it automatically puts it where it needs to be. very well-designed product very happy with the outcome only thing I can suggest that someone else trying this is to not use as much glue as I did really only takes a 1/8 inch bead all the way around like they say, all the way around way cheaper than sending it to JL or paying a speaker repair guy to do itVerified purchase: YesCondition: New
- Jun 21, 2017
Good product
Replaced the foam on my jl audio 12w6v2 sub that had dried out and cracked. There was a big hole it in and i wasnt getting good bass anymore. Took a little while to clean the glue off when removing the old foam. Thanks to the video it wasnt too hard. I used a razor blade, scraped with a flat screwdriver and a chisel, and used some goo gone to really get rid of any last glue still stuck on. Then glued on the middle while propping up the sub with a stick, then glued the edge after an hour and let the whole thing dry overnight. Seems like it worked because now that the sub is hooked back up it pounds harder than it ever did (bought it used). I hope the glue stays strong thats my only worry but it seems pretty solidVerified purchase: YesCondition: New
- Jan 03, 2018
Rebuilding my JL Audio 12W6-v2-d4
Couldn't be more pleased with this kit! Cleaning the old glue off of the sub cone and frame was a little tedious, but only took me around 20-30 minutes. The new surround fit absolutely perfect. The fit is so tight in fact, that it would be hard to mess it up. Just make sure that the glue is fully dry on either the cone, or the frame before attempting to glue the other. I used some balls of wrapping paper to stuff underneath the cone and frame, in order to push the cone out so the lip of the gluing surface on the cone would be flush with the new foam surround. Worked like a charm.Verified purchase: YesCondition: New
- Jun 05, 2019
Works
My JL W6 12 bumps once again! Make sure to use more rubbing with white cotton cloth and 91% alcohol. Support the cone gently holding the lip high enough to use elbow grease while rubbing the old glue off and peeling it off. The surface must feel clean to the touch. Only then is the surface prepped correctly. The metal rim on outside contact must also be scraped, again the alcohol helps to weaken the bonds of the glue. Have fun Haha.Verified purchase: YesCondition: New
- Jul 28, 2017
Perfect solution for a stick situation
This is the second time I've purchased a kit from this company. They are great! Shipping was incredibly fast!!!! WOW! The only thing that could make this better is if they included the necessary tools required for stripping the old adhesive from the speaker. That was the tricky part and requires a lot of elbow grease. Other than that the product its self is flawless and works great!Verified purchase: YesCondition: New
- Aug 02, 2017
nice!!!!
just want to thank you for this repair kit and the video on youtube for repair steps it is well done you guys explain every single detail how to do the work, i bought this kit for cheap vs 600.00 to replace the subwoofer speaker it is awesome thanks guys.Verified purchase: YesCondition: New
- Mar 31, 2020
Very happy with my order item well package and it arrived a lot sooner than expected..
Very nice and simple, quick easy replacement looks like the original foam ....Verified purchase: YesCondition: New
- Jan 28, 2020
Good product
Easy to use. Sub operates and looks great

Verified purchase: YesCondition: New
- Jan 23, 2019
12w6v2
Shipping was crazy fast. The repair kit is of great quality and came with everything advertised. Perfect fit for my jl w6 12". Will do business again.Verified purchase: YesCondition: New
- Jan 16, 2019
Jl audio 12w6v2
Absolutely great product. Exactly as described. Performs exactly as OEM or better.Verified purchase: YesCondition: New